
ThinkLogical SCS Terminal Servers and ConsoleWorks
This article is designed to help users achieve optimum behavior when configuring ConsoleWorks and ThinkLogical SCS terminal servers using SSH with Public Key authentication. The configuration is based on changes made in ConsoleWorks that are not available in versions earlier than v4.6-1u0.
First, it is necessary to load an appropriate SSH Public Key onto the terminal server. See the article Creating and Importing SSH Keys if a new key pair is necessary.
 click here for larger image
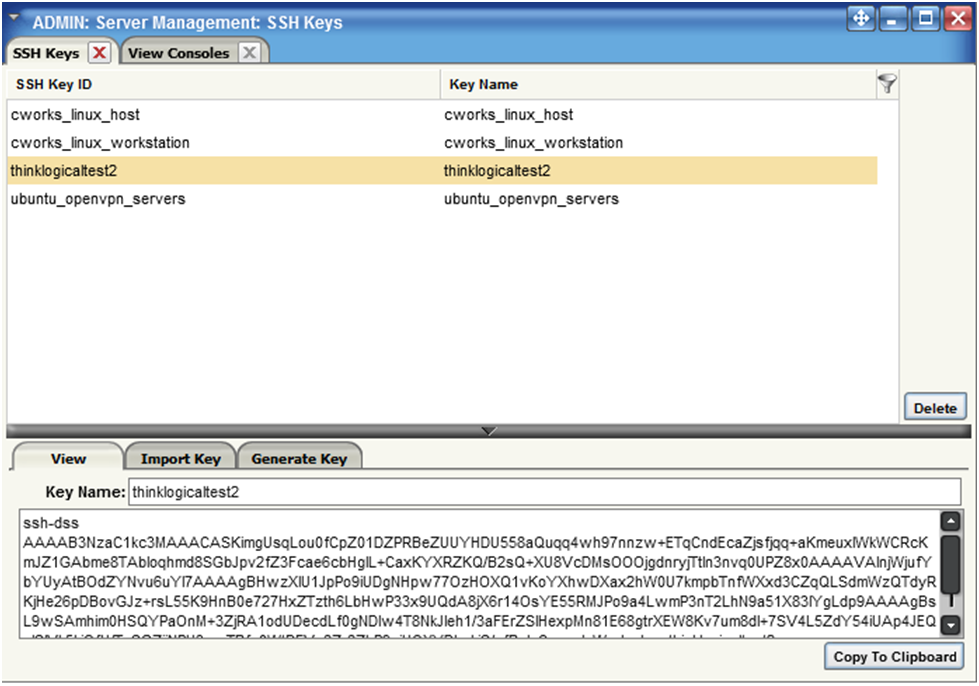
In ConsoleWorks navigate to Admin>Server Management>SSH Keys using the left-hand menu. Select the key pair to be used and then select the View tab. Copy the public key to the Clipboard using the button at the lower right or highlight the key text and press control-X.
 click here for larger image
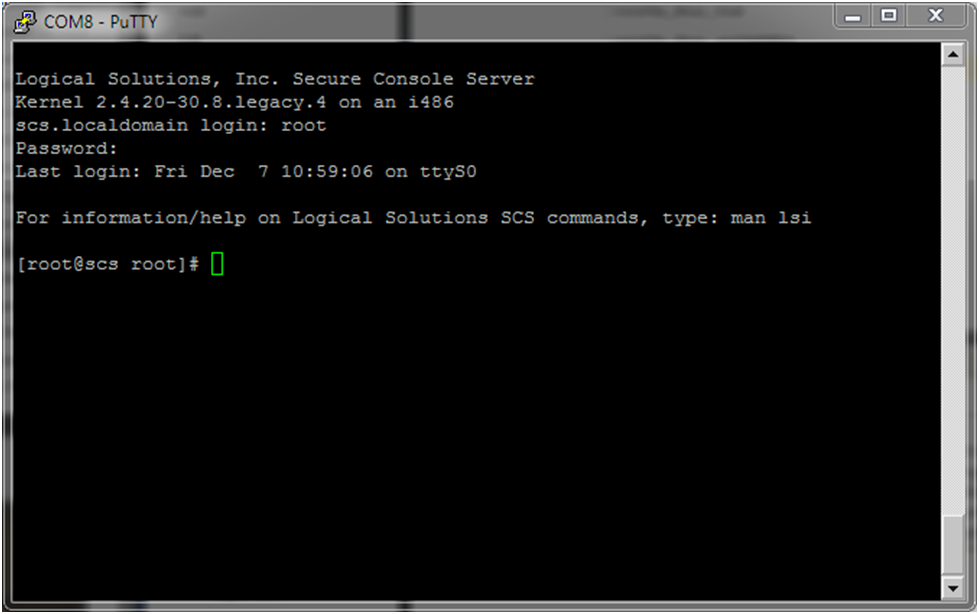
Using a terminal emulator, log in to the terminal server with the username that will be used for configuring consoles in ConsoleWorks. Most people use root and the examples below follow that practice.
 click here for larger image
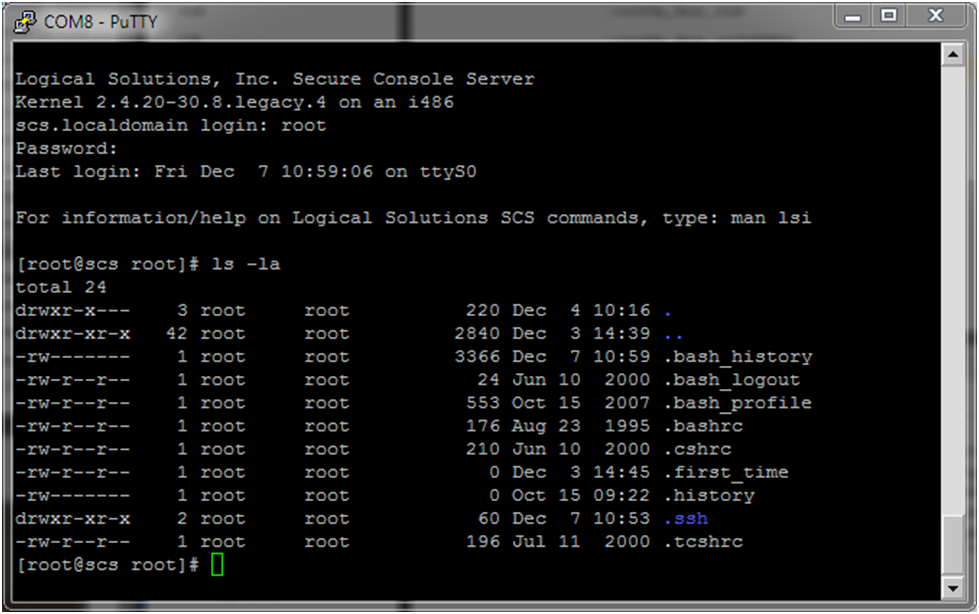
If a directory called .ssh does not already exist, create one by using the command mkdir .ssh.
 click here for larger image
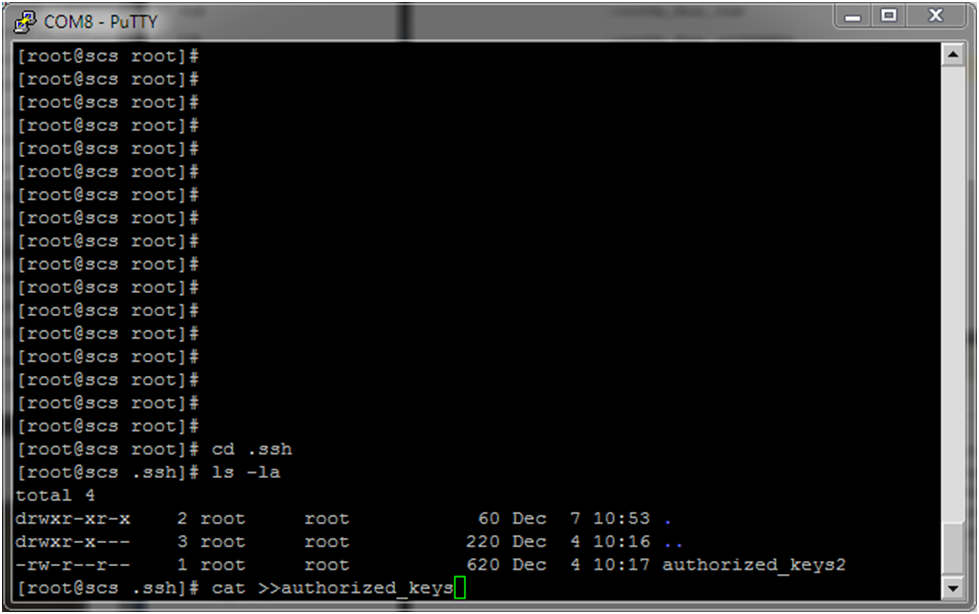
Change directory to the .ssh directory. If the file authorized_keys2 does not exist, create it using the command touch authorized_keys2. Place the key that is in the paste buffer into the file called authorized_keys2. An easy way to do this is to type the command cat >>authorized_keys2, press return, paste the key text into the terminal emulator, and then press control-C. Check the file permissions on both the authorized_keys2 file and on the .ssh directory to ensure that only root can write to the files.
When ConsoleWorks first starts, either initially or as a reboot, all defined ConsoleWorks connections attempt to start simultaneously. This means that when a terminal server is populated with large numbers of consoles, all the connections from ConsoleWorks to the terminal server are attempted at the same time. The same behavior occurs when a terminal server is turned on or rebooted. Different terminal servers behave differently in these situations.
Since the ThinkLogical terminal servers are running a very stable version of Linux, attempting large numbers of simultaneous connections will eventually work, but the total elapsed time for each connection to complete and for all connections to complete can be excessive. When you add in the normal behavior of connection attempt timeouts in ConsoleWorks, it is actually possible that none of the connections will ever complete or that the total elapsed time for them all to complete is even longer.
A minor configuration change on the ThinkLogical will provide optimal behavior, ensuring the maximum number of connections complete in the shortest amount of time.
The default number of simultaneous, unauthenticated SSH connection attempts on the ThinkLogical terminal servers (MaxStartups) is set to 10. Beginning with ConsoleWorks version v4.6-1u0, changing this value to 6 provides the optimal behavior. On a fully populated SCS480 or SCS480-4 (48-ports) the total elapsed time on initial start should be a few seconds longer than 4 minutes. If you are using versions of ConsoleWorks prior to v4.6-1u0, we recommend that you upgrade. If it is impossible to upgrade, then change MaxStartups from 10 to 2. Total elapsed time until all connections will complete will be at least 12 minutes.
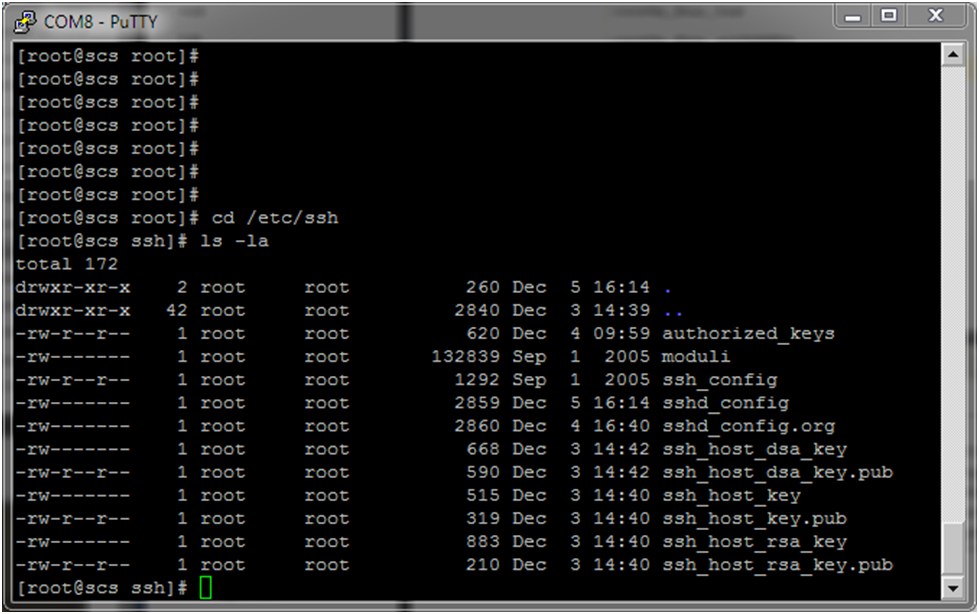 click here for larger image
To make this change, log into the ThinkLogical as root. Change your directory to /etc/ssh. Make a copy of the file sshd_config so that you can return the configuration to the original state in case of any mistakes during editing.
 click here for larger image
Using vi, edit the file /etc/ssh/sshd_config. Search for the line containing the parameter MaxStartups. By default this parameter is commented out. Remove the “#” at the start of the line. Then change the value of the parameter to 6. The default is 10.
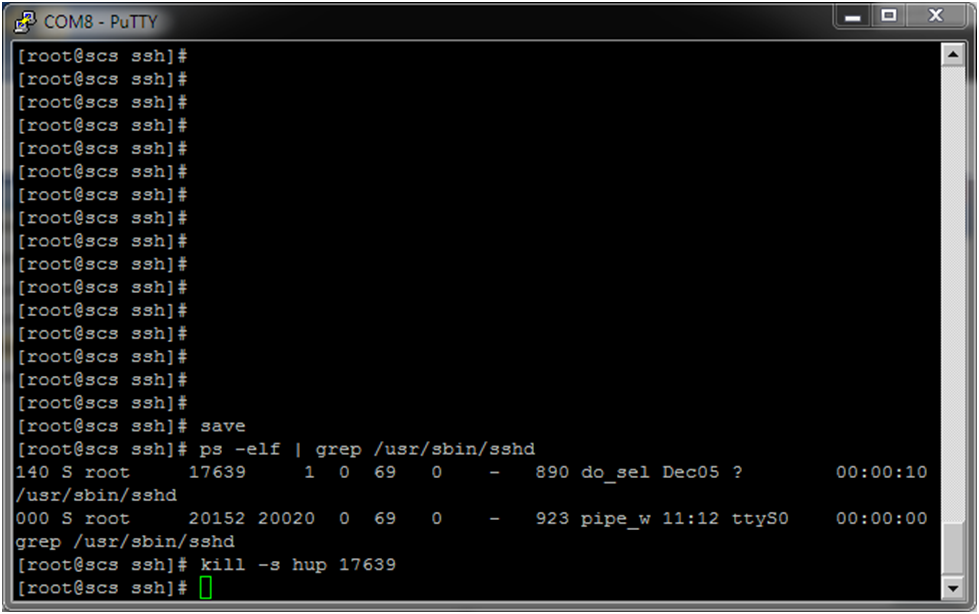 click here for larger image
Save the file and then save the configuration to non-volatile memory using the command save. Be patient, the save command can take some time. After saving the configuration, either send the “hup” signal to the demon process for /usr/sbin/sshd or reboot the terminal server.